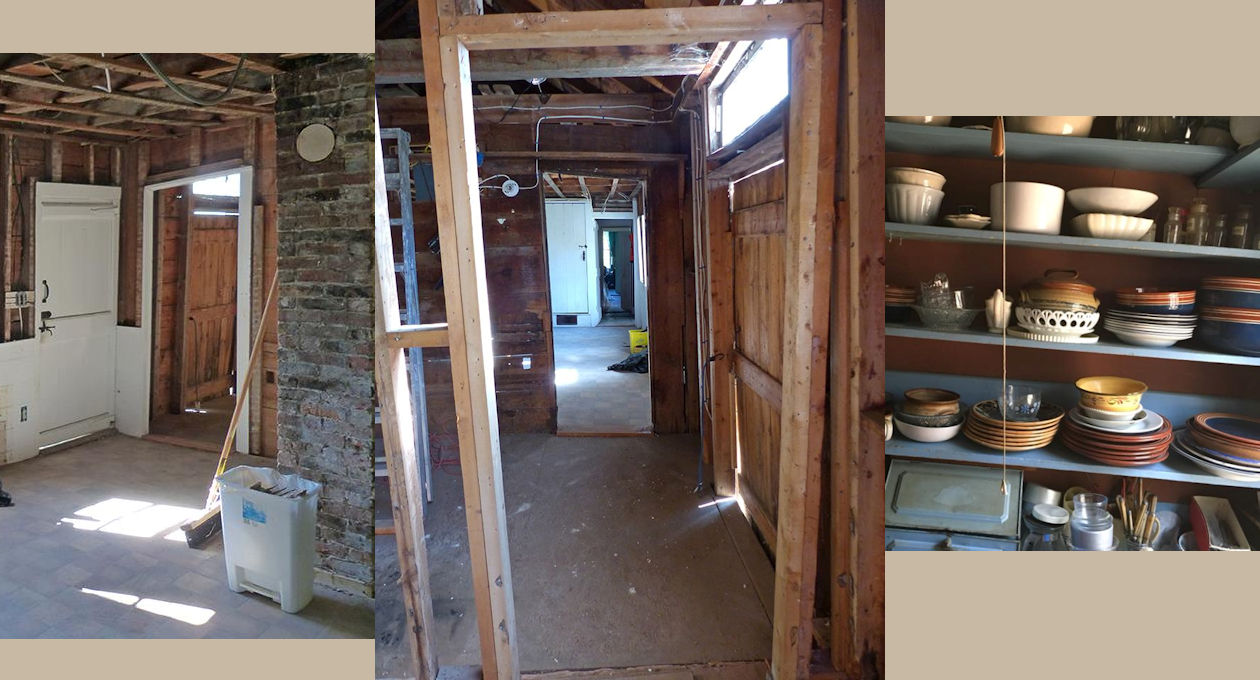
When you live somewhere or visit it frequently, you don't necessarily stop to notice that things have moved a bit in time, and doorways that were once square - aren't.
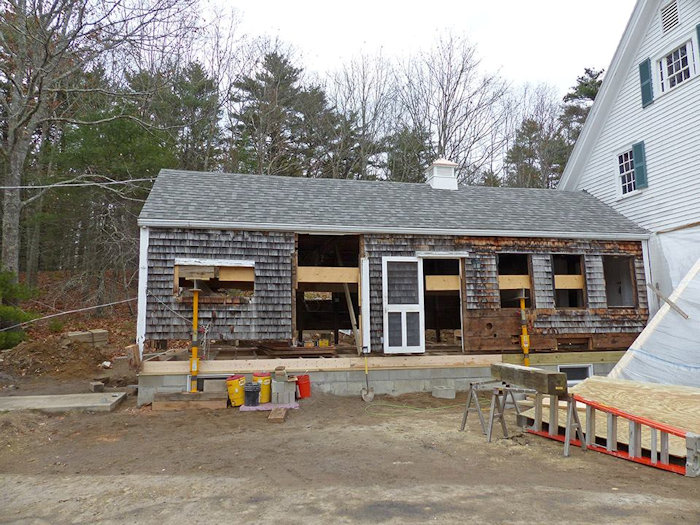
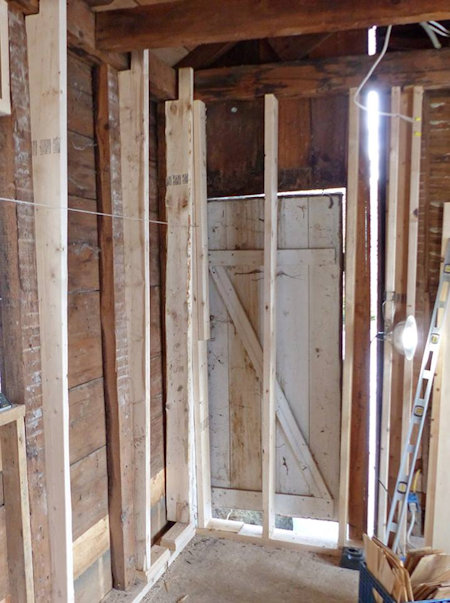
The picture at the left shows the doorway from the kitchen into the back room where the freezer was kept. And we're pretty sure the house wasn't built like that, and back before the outside wall began settling as the sills rotted and the foundation walls crumbled, the doorway really was square. The middle picture is looking into the kitchen from the other side of the room where the freezer was - and for reference, the open door at the far end leads into the main house, and the frame at the top is pretty close to square. The picture on the right is the pantry, which is on the other side of the chimney you see in the picture on the left - and the line in the middle is the pull-cord for the light - and it's going straight up and down. Conclusion - that outside wall was also in pretty bad shape. The picture should click bigger.
The pantry picture also hints at another part of the project - Dahlov and her husband Adolph moved into this house in 1937 - so there were 80 years of belongings in the kitchen wing that had to be packed away before work could begin - and many of the fragile items in the main house were also packed away - while that part of the house was in much better shape, it also needed a new foundation, and many of the beams that supported the floor needed replacing, though the floor itself happily did not need to be removed.
Charlie has a lot of pictures documenting the process in an album on his Facebook page - Jewett Builders, Robinhood Farm. Here are a few of them as a teaser. Jewett Builders began work on the project on October 16, 2017, and this was written around December 10 - lots of work in not quite two months.
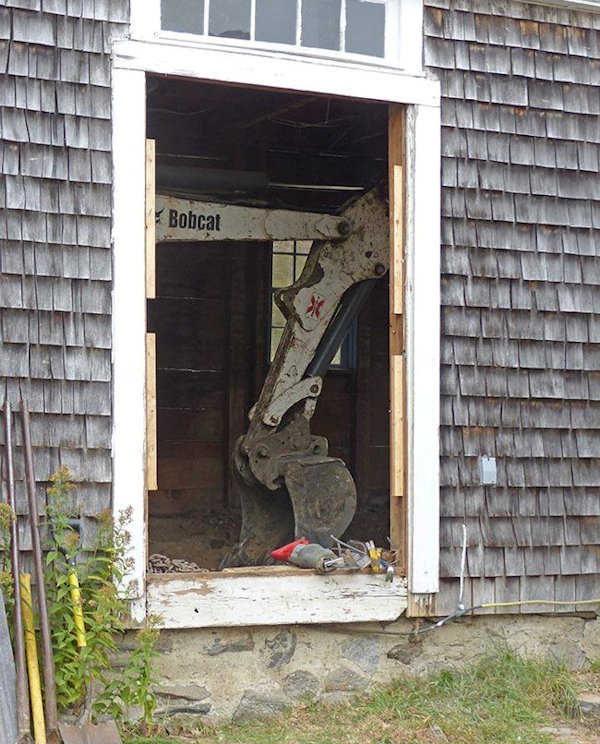
After digging the earth away from the house and installing a series of jacks to support the main house, this little Bobcat went down the slope into the cellar to work on the dirt floor and old foundation walls from the inside.
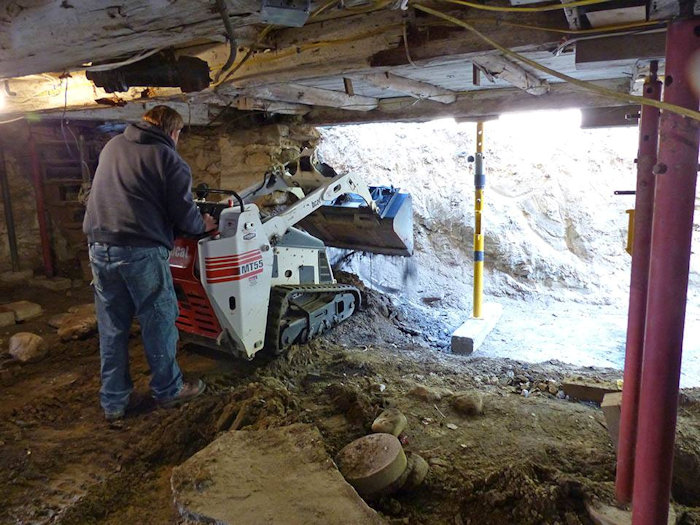
There used to be stairs up to the kitchen and a foundation wall beyond the little front loader.

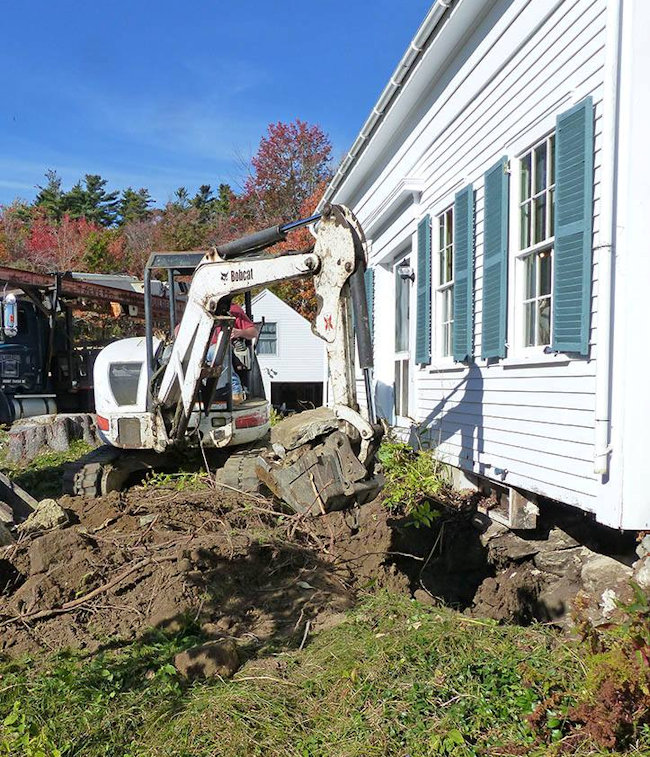
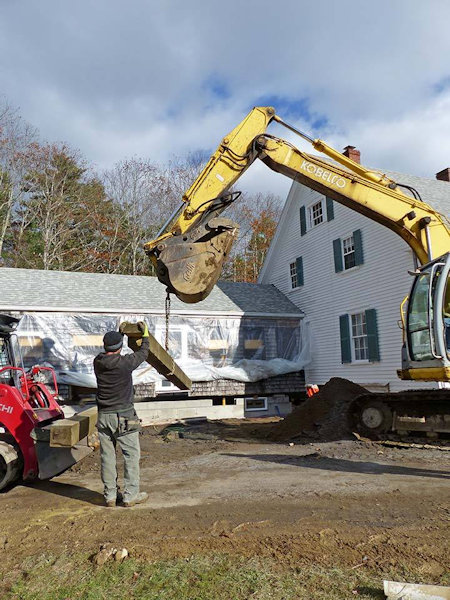
Digging out the southeastern corner of the main house - you can see the little light beside the front door into the house. It's amazing how they can work with such huge equipment so close to the house!
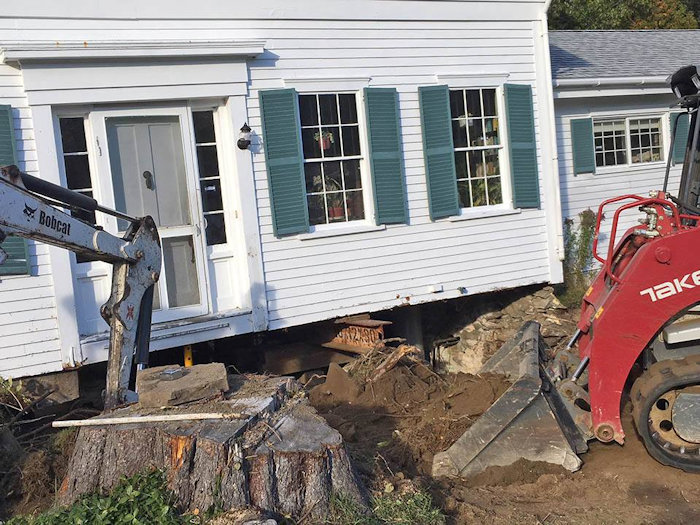
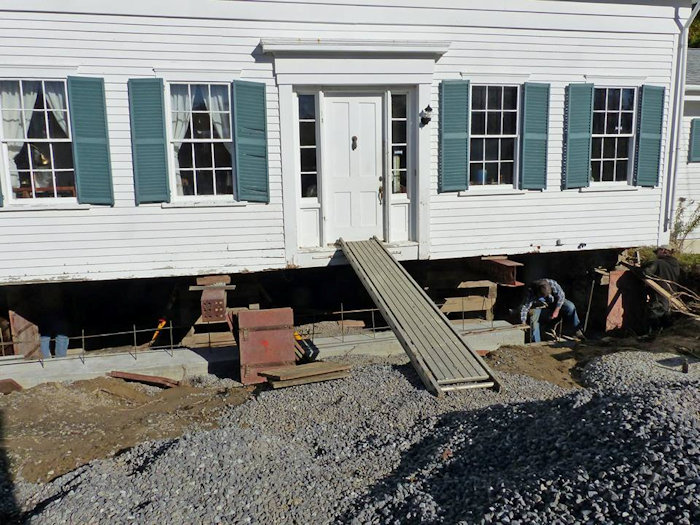
This is looking at the south side of the house - the corner they were digging out above is on the right, and you have a better look at the front door. For a while, the only way into the house was via a stepladder! And you can see the first of the steel beams that supported the house during much of the work.
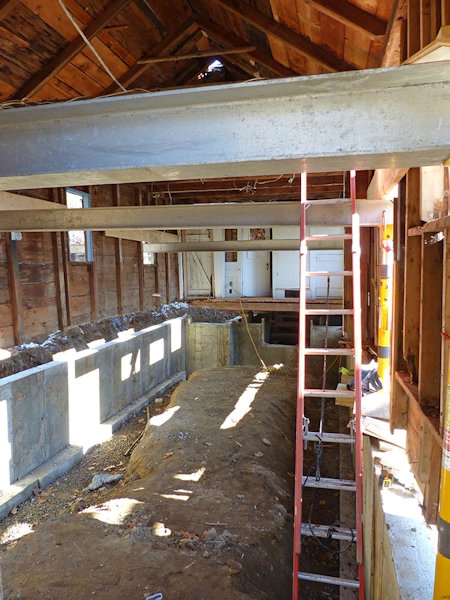
This is what the beams look like from the basement perspective - the supports are all inside where the walls will go, though the end of the beams stick out, so they can be pulled out when the wall is ready to take the strain. Charlie noted that many of the floor joists (the beams holding up the floor) are rotten. And they probably are old enough that it's not surprising - many of them look like trees, still mostly round with bumps where the branches were removed.
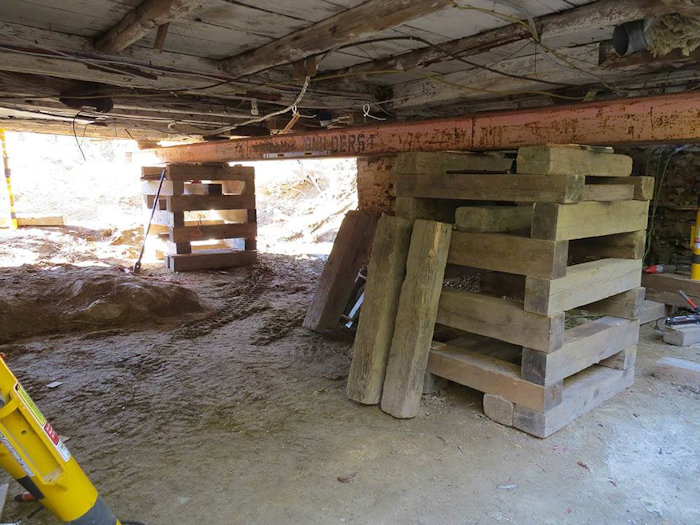
A better look at some of the half tree floor joists - there's still bark on some of them!

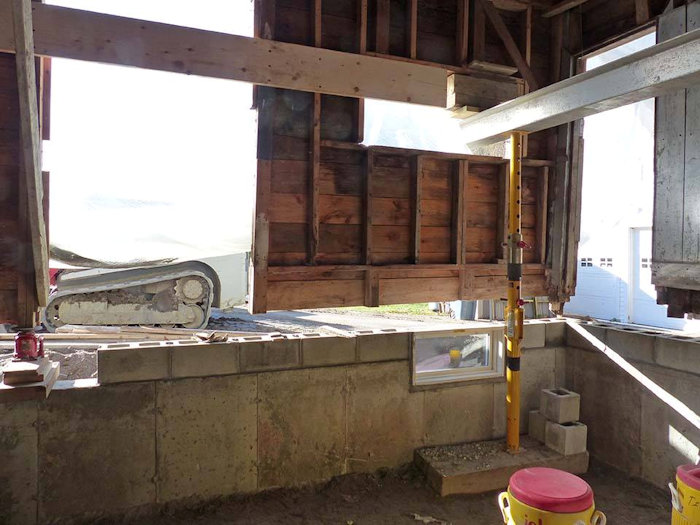
They removed part of the (very rotten) back wall of the kitchen wing so the bigger digger could get inside; one room in the wing had a concrete floor - making it a state-of-the-art milk processing room in the 1950s when Charlie's parents ran a dairy farm here.
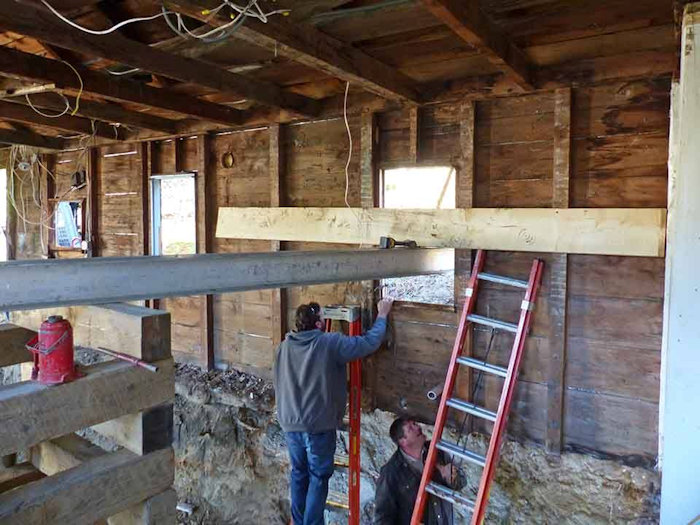
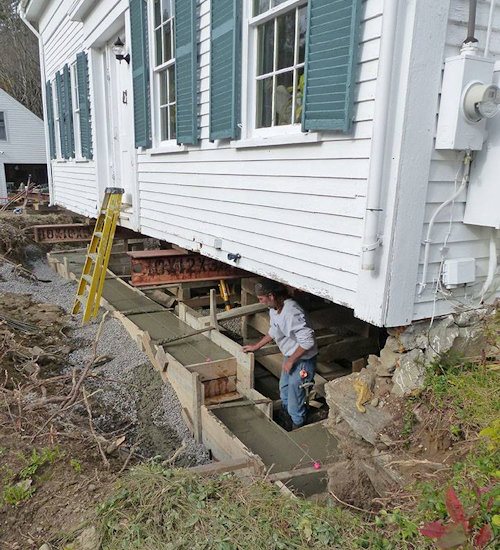
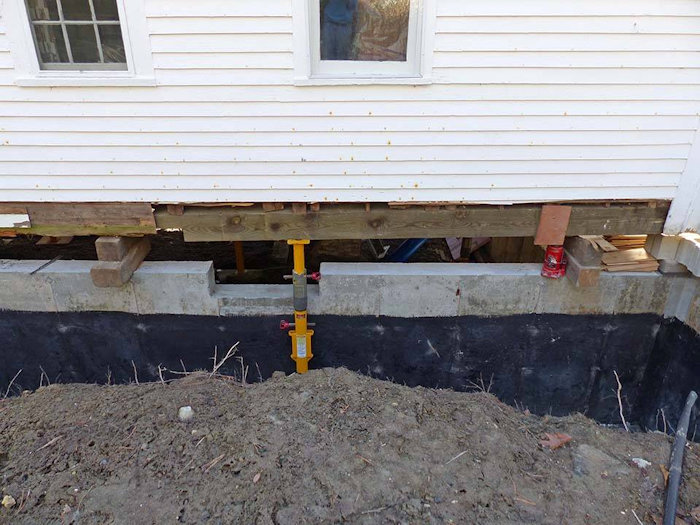
The sills and lower wall studs in the kitchen wing were too rotten to support the building, so the crew is attaching a 2x12 board to the solid upper part of the studs, and running the steel beams through the windows to take the weight of the house while they remove the old foundation and put in the new one.
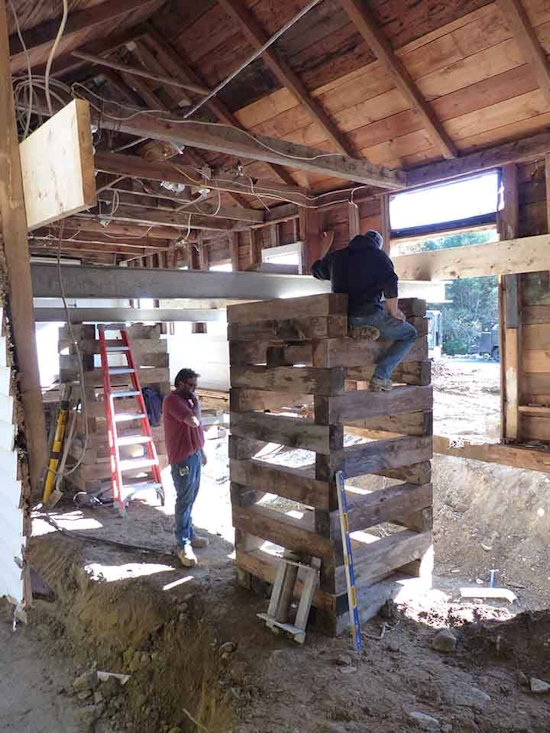
A better look at the beams and their support structure. The kitchen wing just had a crawl space underneath - and it won't have a full basement, but it will have 3 or 4 foot headroom, which is a lot more than before. And it will be sealed much better - no more icy winds coming up through the floor!
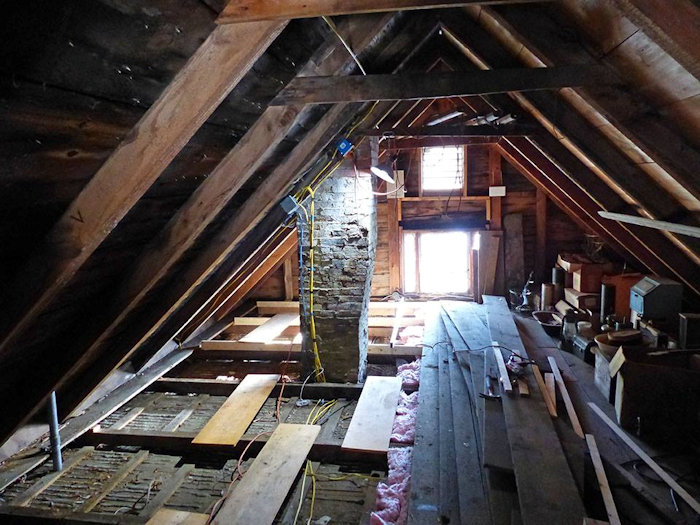
We've been focusing on the foundation work - but there is a lot of other work involved in the project; this is the attic of the main house, where Charlie is raising the floor, putting in a vapor barrier between the joists, inserting 10 inches of fiberglass insulation, and screwing the floor back down.
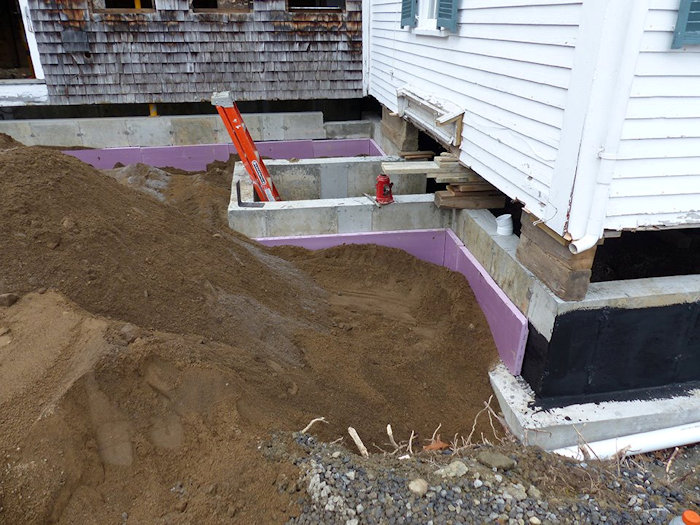
So far we've mostly been showing the destruction stage - this is the start of the rebuilding! The framework under the southwest corner of the kitchen wing is part of the form for the foundation wall footings.

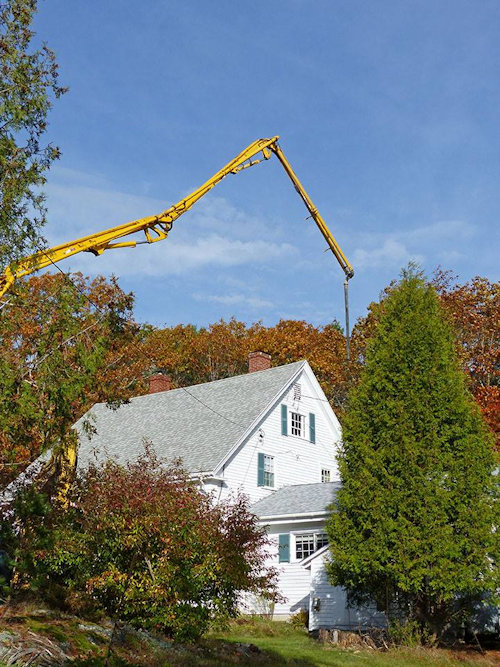
We had wondered how they would get the big cement truck around to the back of the house to fill the forms on that side - here's the answer - they don't! This is a concrete pumping crane. A BIG concrete pumping crane.
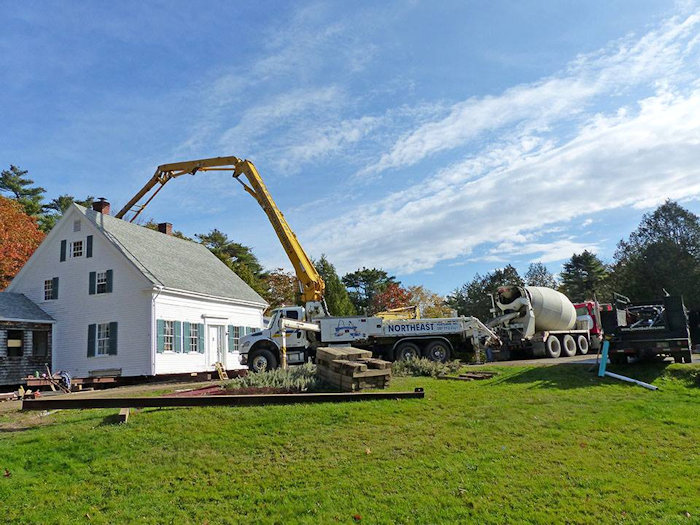
Another view - the delivery hose is dangling at the end of the crane.
The footing forms are full; note that they are stepped because there is a ledge in the main house basement that's a bit non-negotiable. Another view of the stepladder access to the main house.
At this point they were able to put a temporary ramp to the front door. You can see the steel rebar sticking up from the footing, waiting for the concrete walls to be added.
Forms for the foundation wall in the kitchen wing installed. There will be a couple of rows of cement blocks on top of this, then the new sill. The forms for the main house are similar - but these have better lighting, thanks to the large hole in the wall!

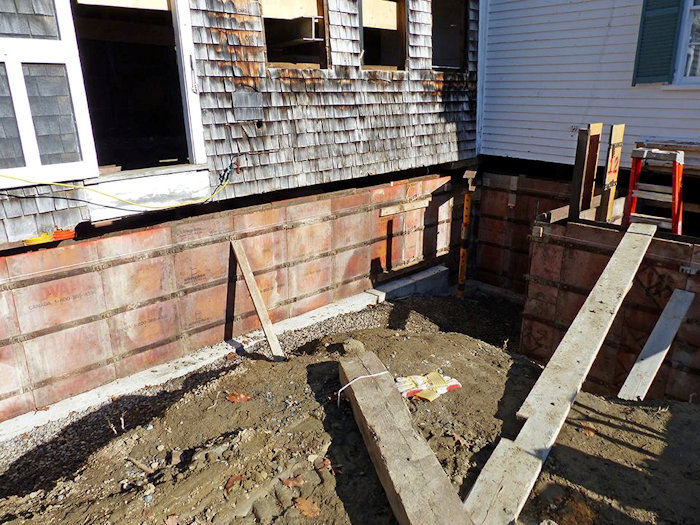
The foundation wall forms from the outside. You'll notice that the footing is wider than the walls - and it's even wider on the back side of the house, where water runs down towards the house from the ledge in back. The structure on the right is the framework for the bulkhead - must admit it took me (Judy) a minute to realize that all of this will be covered by dirt when they are done, so the bulkhead will be down in the ground where it belongs!
This shows the forms filled with concrete - and also shows that the original wall is not exactly straight up and down like the foundation wall - so they will need to do a bit of work to connect everything.
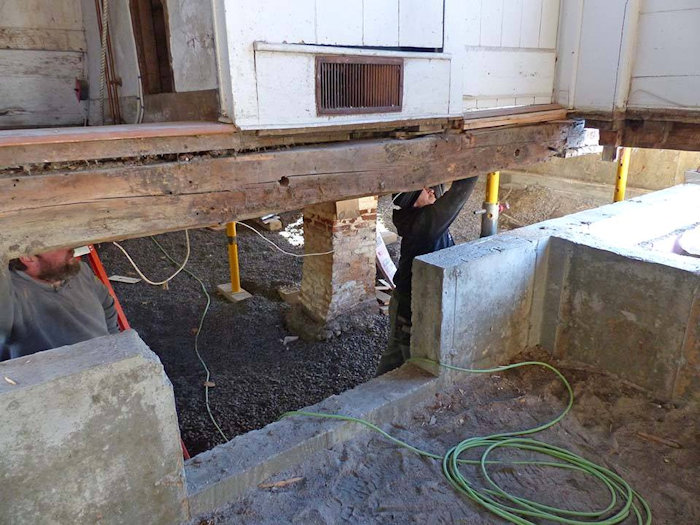
The steel beams that are supporting the kitchen wing are now being held up by yellow jacks on the foundation walls. making more room inside for the next stage of the work. This is looking towards the main house from the west end of the kitchen wing - and if you look carefully, you can see four doors at the end - one going out (which will be boarded up), one going down to the cellar, one going to the back stairs to the second floor, and one going into the first floor of the main house. Most of the large lump of marine clay in the center was removed to level the enhanced crawl space.
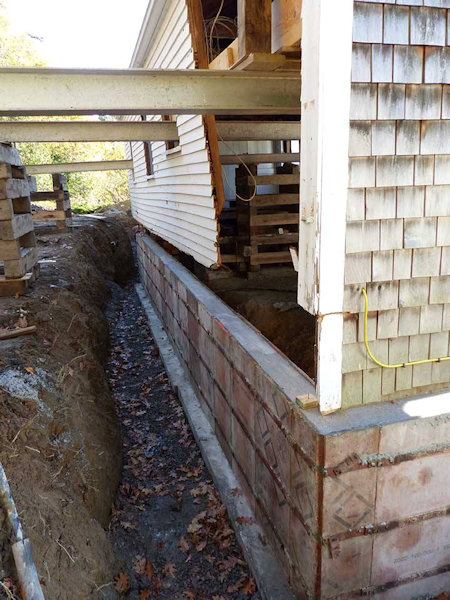
New soil being put around the insulation board on the outside of the concrete foundation walls. The main house is on the right and the kitchen wing on the left; the stepladder is coming up from the bulkhead.
One of the construction crew is sawing through the old sill that held up the side of the main next to the kitchen wing. The perspective is a bit confusing, but the sill is over the cement wall with the opening in it - and that pass-through opening will be where the forced hot air heating ducts, water supply and sewage pipe will be coming from the main house into the kitchen wing.
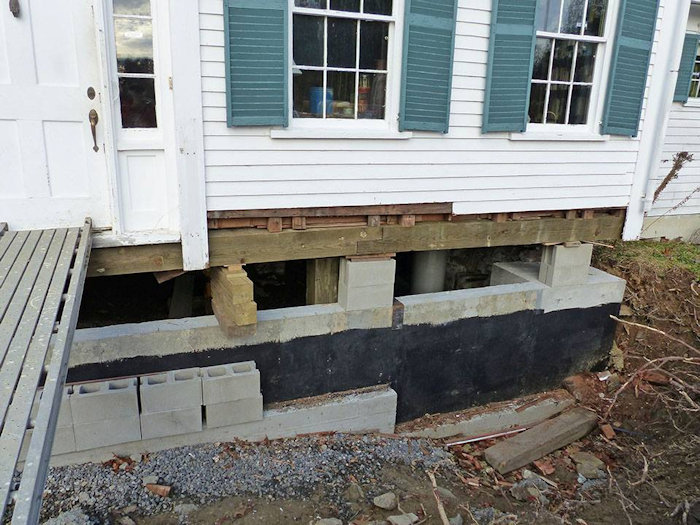
This is the southwest corner of the kitchen wing from inside. You can see one of the two basement windows that will provide some light to the crawlspace - and there's now a row of cement blocks going in. There will be a "boxed sill" above that, which is a wood structure that will support the vertical studs.
New sill arriving, to be positioned under the main house on the kitchen side (where the old one was removed a few pictures earlier).
This picture of the new sill being installed on the north side of the main house shows several parts of the process. The nice square horizontal beam on the right is part of the new sill; the rougher beam on the left is a section of the old sill that will be replaced. The cutout portion on the left end of the new sill will join with a similar cutout on the next sill, so the two can be bolted together. There is a cutout section of the foundation wall behind the yellow jack where a window will go. And there will be at least one row of cement blocks on top of the foundation wall that will support the sill when they're done. The black on the bottom part of the foundation wall is sticky substance that will hold the purple insulation boards in place while the new soil is being put in place - but that's a few steps later.
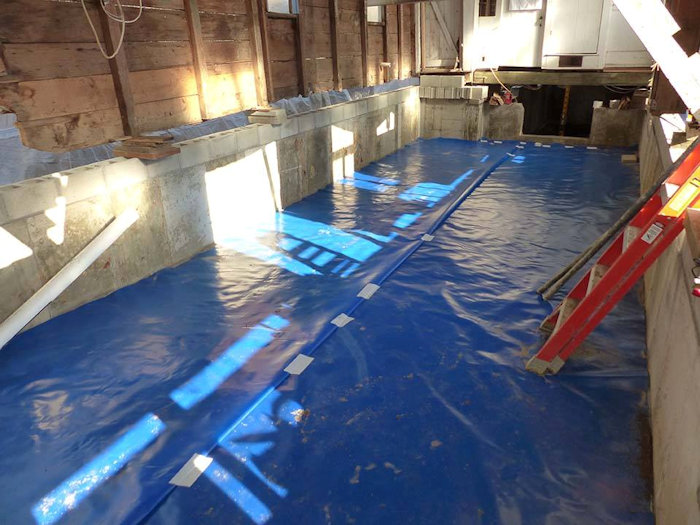
This may not be a major part of the story of the renovations - but it's a fun picture! It's the vapor barrier that was installed in the bottom of the kitchen wing crawl space before the new cement floor was poured - and we were sorely tempted to add some tropical fish decals or maybe a few rubber duckies as a surprise for the crew when they returned in the morning!
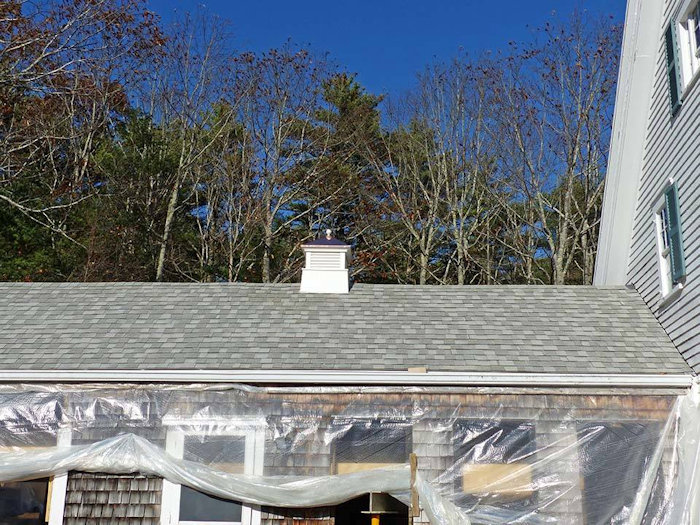
Charlie added the cupola on the kitchen wing - it covers the hole where the old chimney was, and functions as a top vent for what will become the attic crawl space. And it contains screening, so bugs can look inside, but can't move into the attic.
Here's the new sill on the south side of the main house. It looks as if there will be two rows of cement blocks on top of the foundation wall - and you can see where two beams meet over the pair of blocks supporting the sill in the middle.
Box sills installed in the kitchen wing.
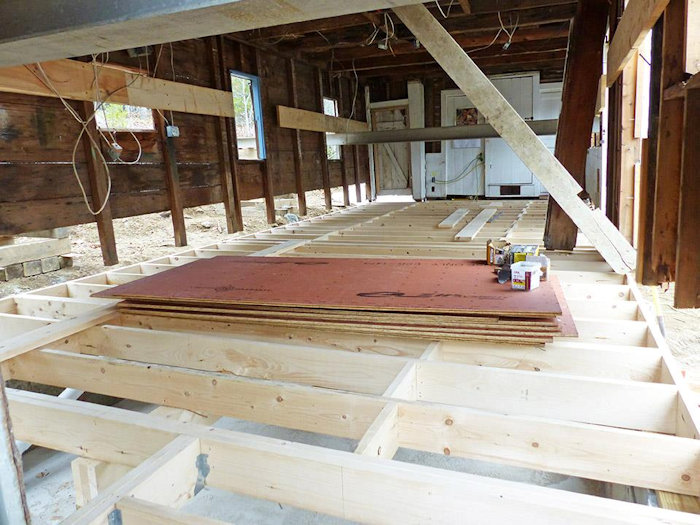
Floor joists installed, and subflooring ready to be put down. I think the big diagonal beam is either to encourage the front wall to become a bit more vertical, or to keep things from getting even more tilted than they already are.
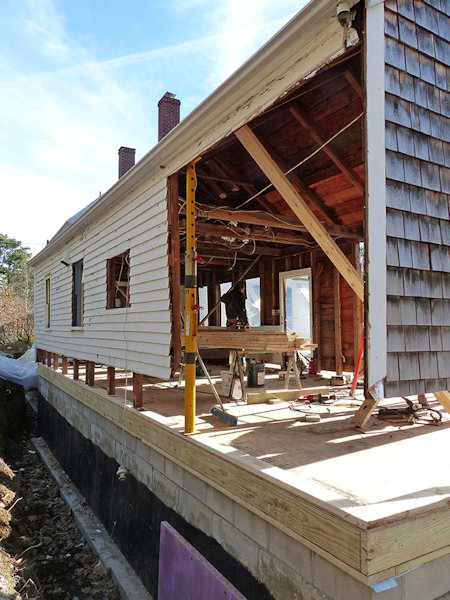
Box sill and subfloor complete, and part of the north wall is attached to the new sill - and looks much closer to vertical than it did. You can also see one piece of insulation board, with the rest of the wall covered with the black sticky layer that holds the insulation board. And the lovely footing looks as if it needs to be swept! (Not really - it will soon be covered with dirt - but most pictures have been right after installation, when it's pristine.)
New 2x6 replacement wall for the most damaged areas of the kitchen wing. The corner post was also rotten, and they were able to replace it with a vintage one Charlie had saved from another old building.

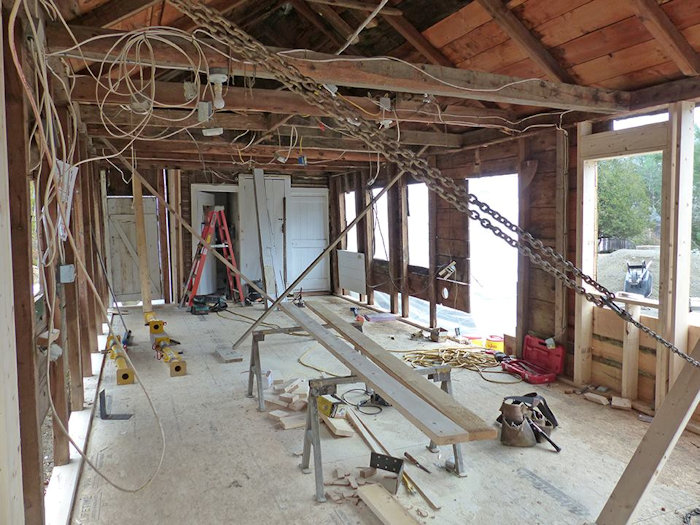
It looks a bit messy - but it's actually looking like the inside of a house now! There will be three rooms in the kitchen wing - a large kitchen next to the main house, a laundry room, and a storage room. I think the chain is encouraging the walls to stay as square as possible.
Room partitions, topped by new ceiling joists. There's another image in Charlie's Facebook album that shows it more clearly, but the diagonal brace you can see in the wall nearest the main house is actually cut into the partition wall, to help stabilize everything without making the wall extra wide.

As an interesting aside, the initial part of the main house was built in the 1840s and was only one room deep; it was expanded from two rooms to four rooms in the 1860s, and an additional story was added. We're not sure when the kitchen wing was added - but think it started its life as a separate building probably in the 1840s and was moved to this location and basically shoved up against the main house. And there was a four-inch gap between the two buildings, that was pretty much masked by sheathing and siding and such. Charlie talked with the building crew about ways to handle that, and we ended up having a 2x6 cut to fit in the gap. This will allow the corner post to be exposed (the bottom 5 inches of the ceiling joists in the kitchen will also be exposed, with sheetrock between them which will be screwed into the plywood on top of the joists.

After all of the pushing and pulling, the walls of the kitchen wing were a lot closer to vertical than they had been in years - but unfortunately the kitchen wing building was probably a bit less than square when it was initially attached to the main house - and unattaching it and squaring it up was well beyond the scope of the project - so the part of the kitchen wing nearest the main house has walls that are much better - but still not vertical. And that's where the kitchen will go. And the north wall is where the kitchen cabinets are going to go - and they really prefer to be on vertical walls - so Charlie installed new slightly-tapered studs - so the outside edge of the studs match the outside wall - and the inside edges are nicely vertical, and ready for the sheetrock that will cover them before the cabinets are attached.
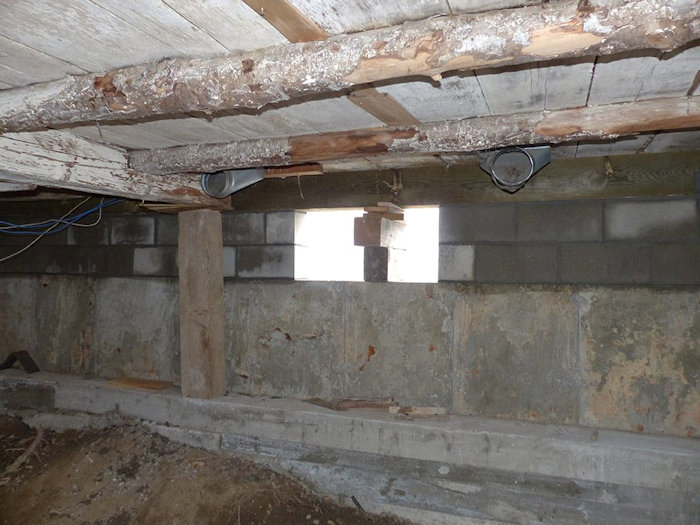
The next phase of the project for the kitchen wing is to put in the rough electrical and add insulation, and then Charlie and his assistant Chad can begin doing walls and floors and stuff like that. As of about December 10, Jewett Builders had a few projects left in the basement of the main house, including replacing the charming but not structurally sound floor joists with some more traditional rectangular type joists and possibly adding at least one more big beam across the middle so the joists don't have such a long run. You can see some of the old joists here - and the bright spot in the wall is where one of the windows will go. Their final job will be to put a concrete floor in the basement of the main house. And then the plumber can install the furnace, and once there's heat, the water can be turned back on (and new lines installed as needed, which is probably all of them) - and new electrical at least in the basement and the kitchen wing. But I think we're heading towards the finish line!
There are many more pictures - and larger versions of most of these pictures -
in Charlie's Facebook album Jewett Builders, Robinhood Farm, 2017